If you want to solve a problem in the field of quality assurance and improve quality, contact us!
qa@ap-x.hu
6-Sigma
In the data collection and TEST section, we have already mentioned the technical conditions. The other important component is the analysis of the data with the right algorithms. These statistical calculations can help a lot in solving quality assurance problems. The 6s, (SixSigma) methodology is gaining more and more ground. It is not our intention to provide a comprehensive survey of 6S-theory, therefore very briefly and not exactly, we describe it as follows:
Most manufacturing operations are repeated on each workpiece. The performed operation can be characterized by one or more (nominal) parameters. In reality, due to inaccuracies of technical implementations, the measurable value of the given parameter moves around this nominal value. Examining many workpieces, we see that the value shows a standard deviation around the original (nominal) value, which in most cases is normally distributed and can be characterized by a Gaussian curve. The distance of the inflection point of the curve from the nominal value is called sigma (s). Six times this distance is 6s. On the Gaussian curve, at a distance of 6s from the nominal value, only the 10-6 (one millionth) part of the total studied population falls. The goal of SixSigma is therefore to reduce rejected (failed) operation to 1/1 000 000. Of course, to be able to reach this rate, the acceptable value of the tested parameter must be 6s or more away from the nominal value. This is easy to imagine, not to implement at all.
This mystical-sounding thing no longer seems impossible after a few attempts. We also managed to complete some useful SixSigma projects. We illustrate the practical implementation of the above with a simple and easy-to-understand example:
Abstract

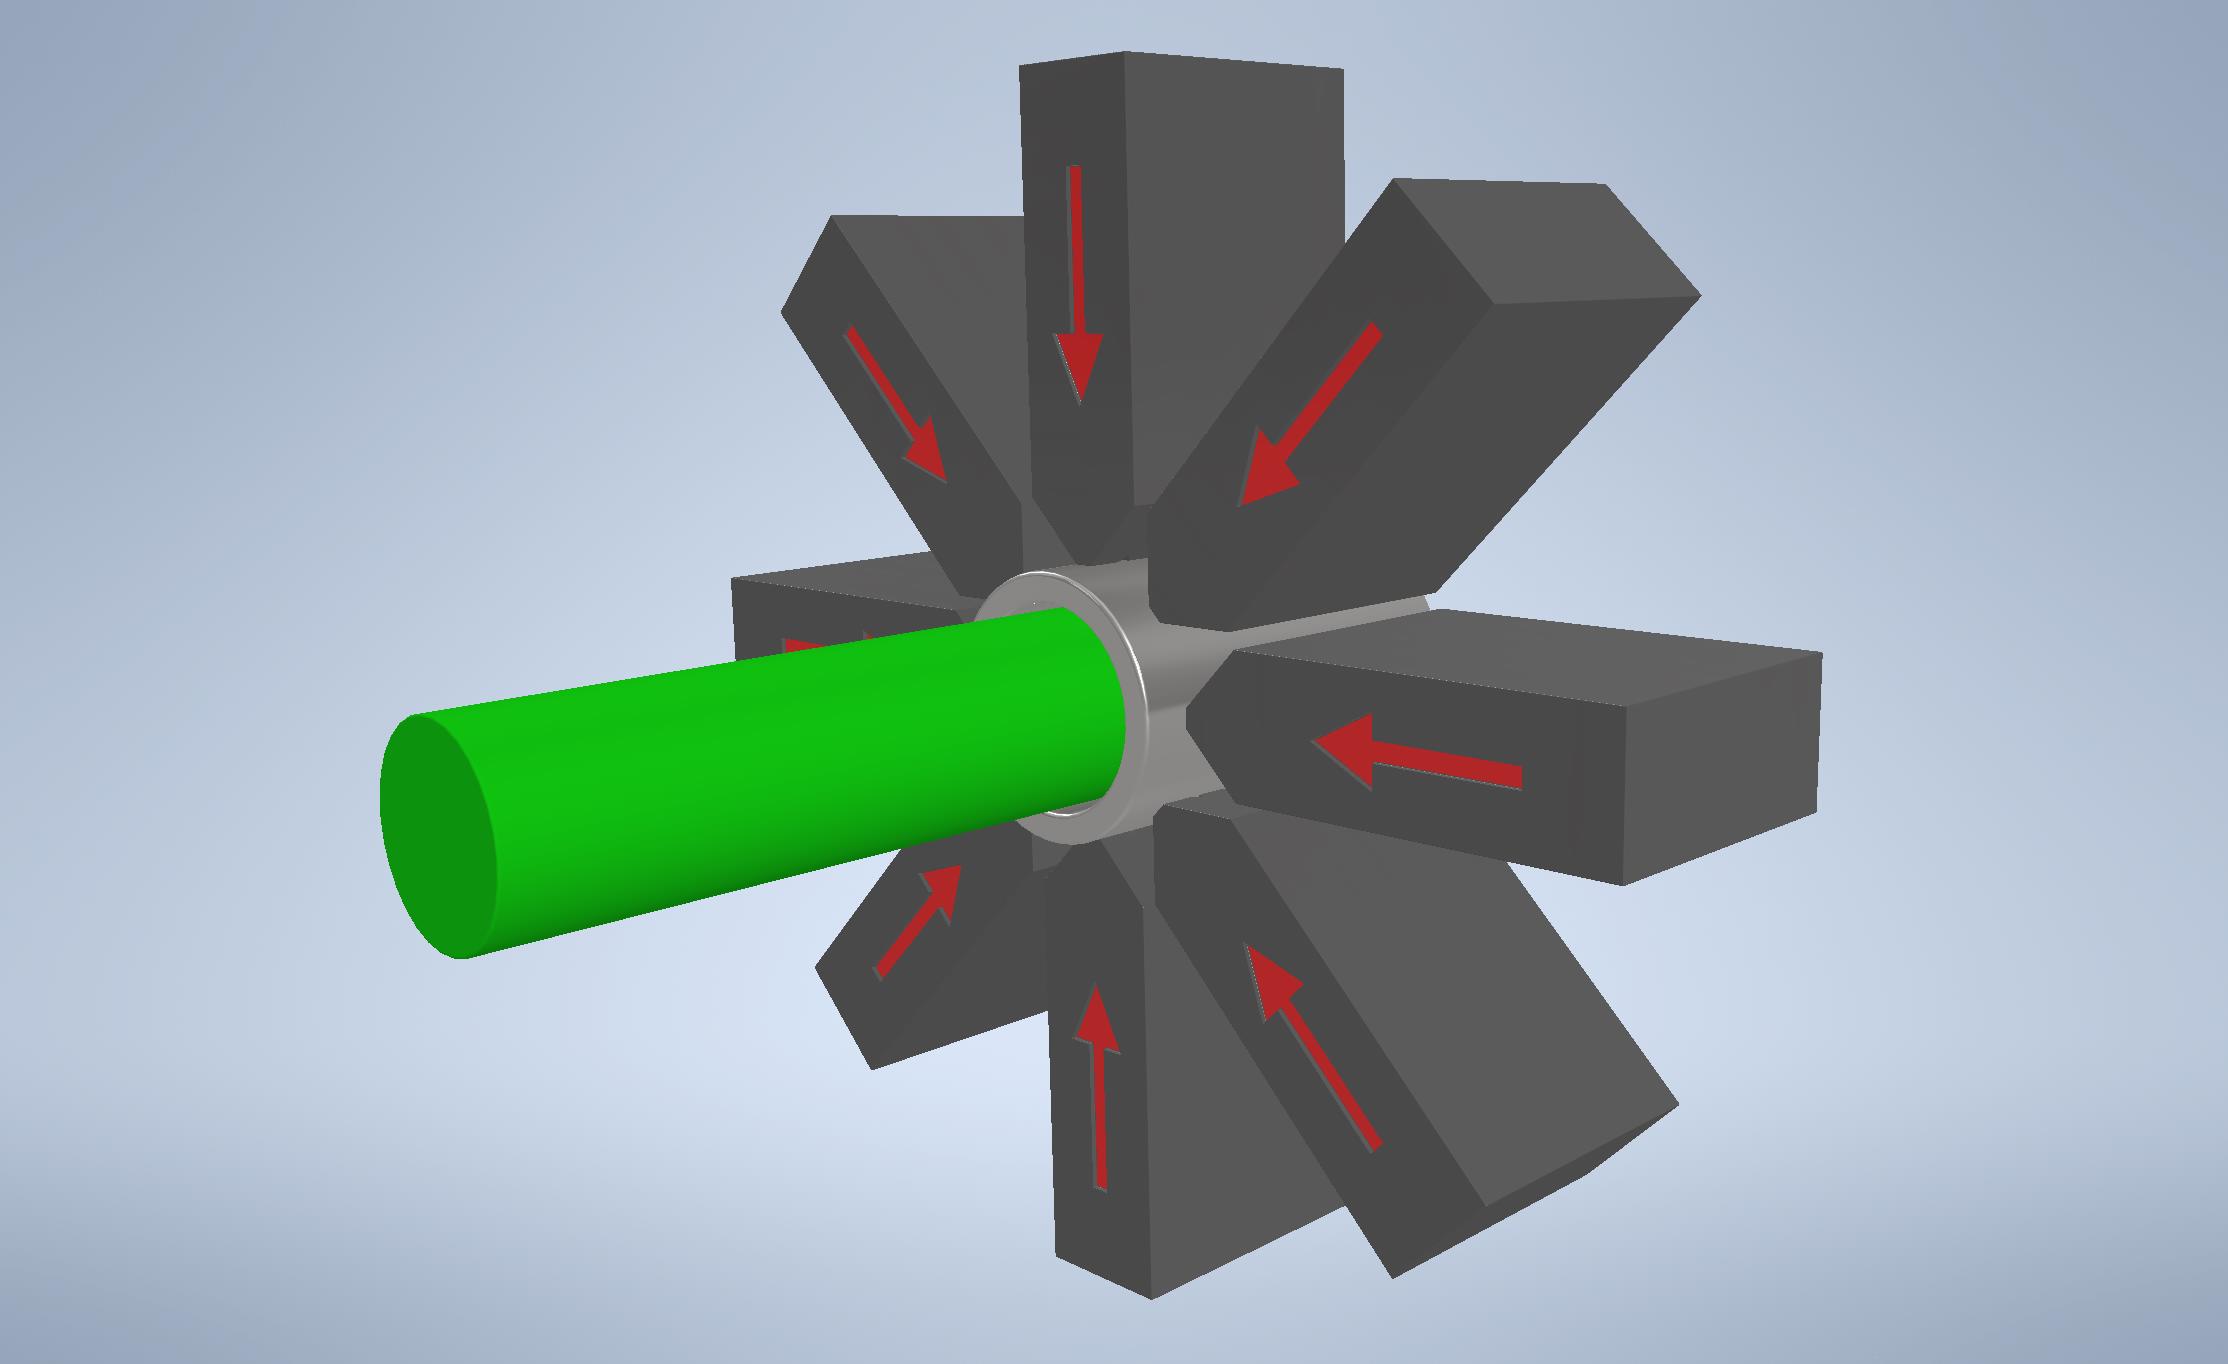
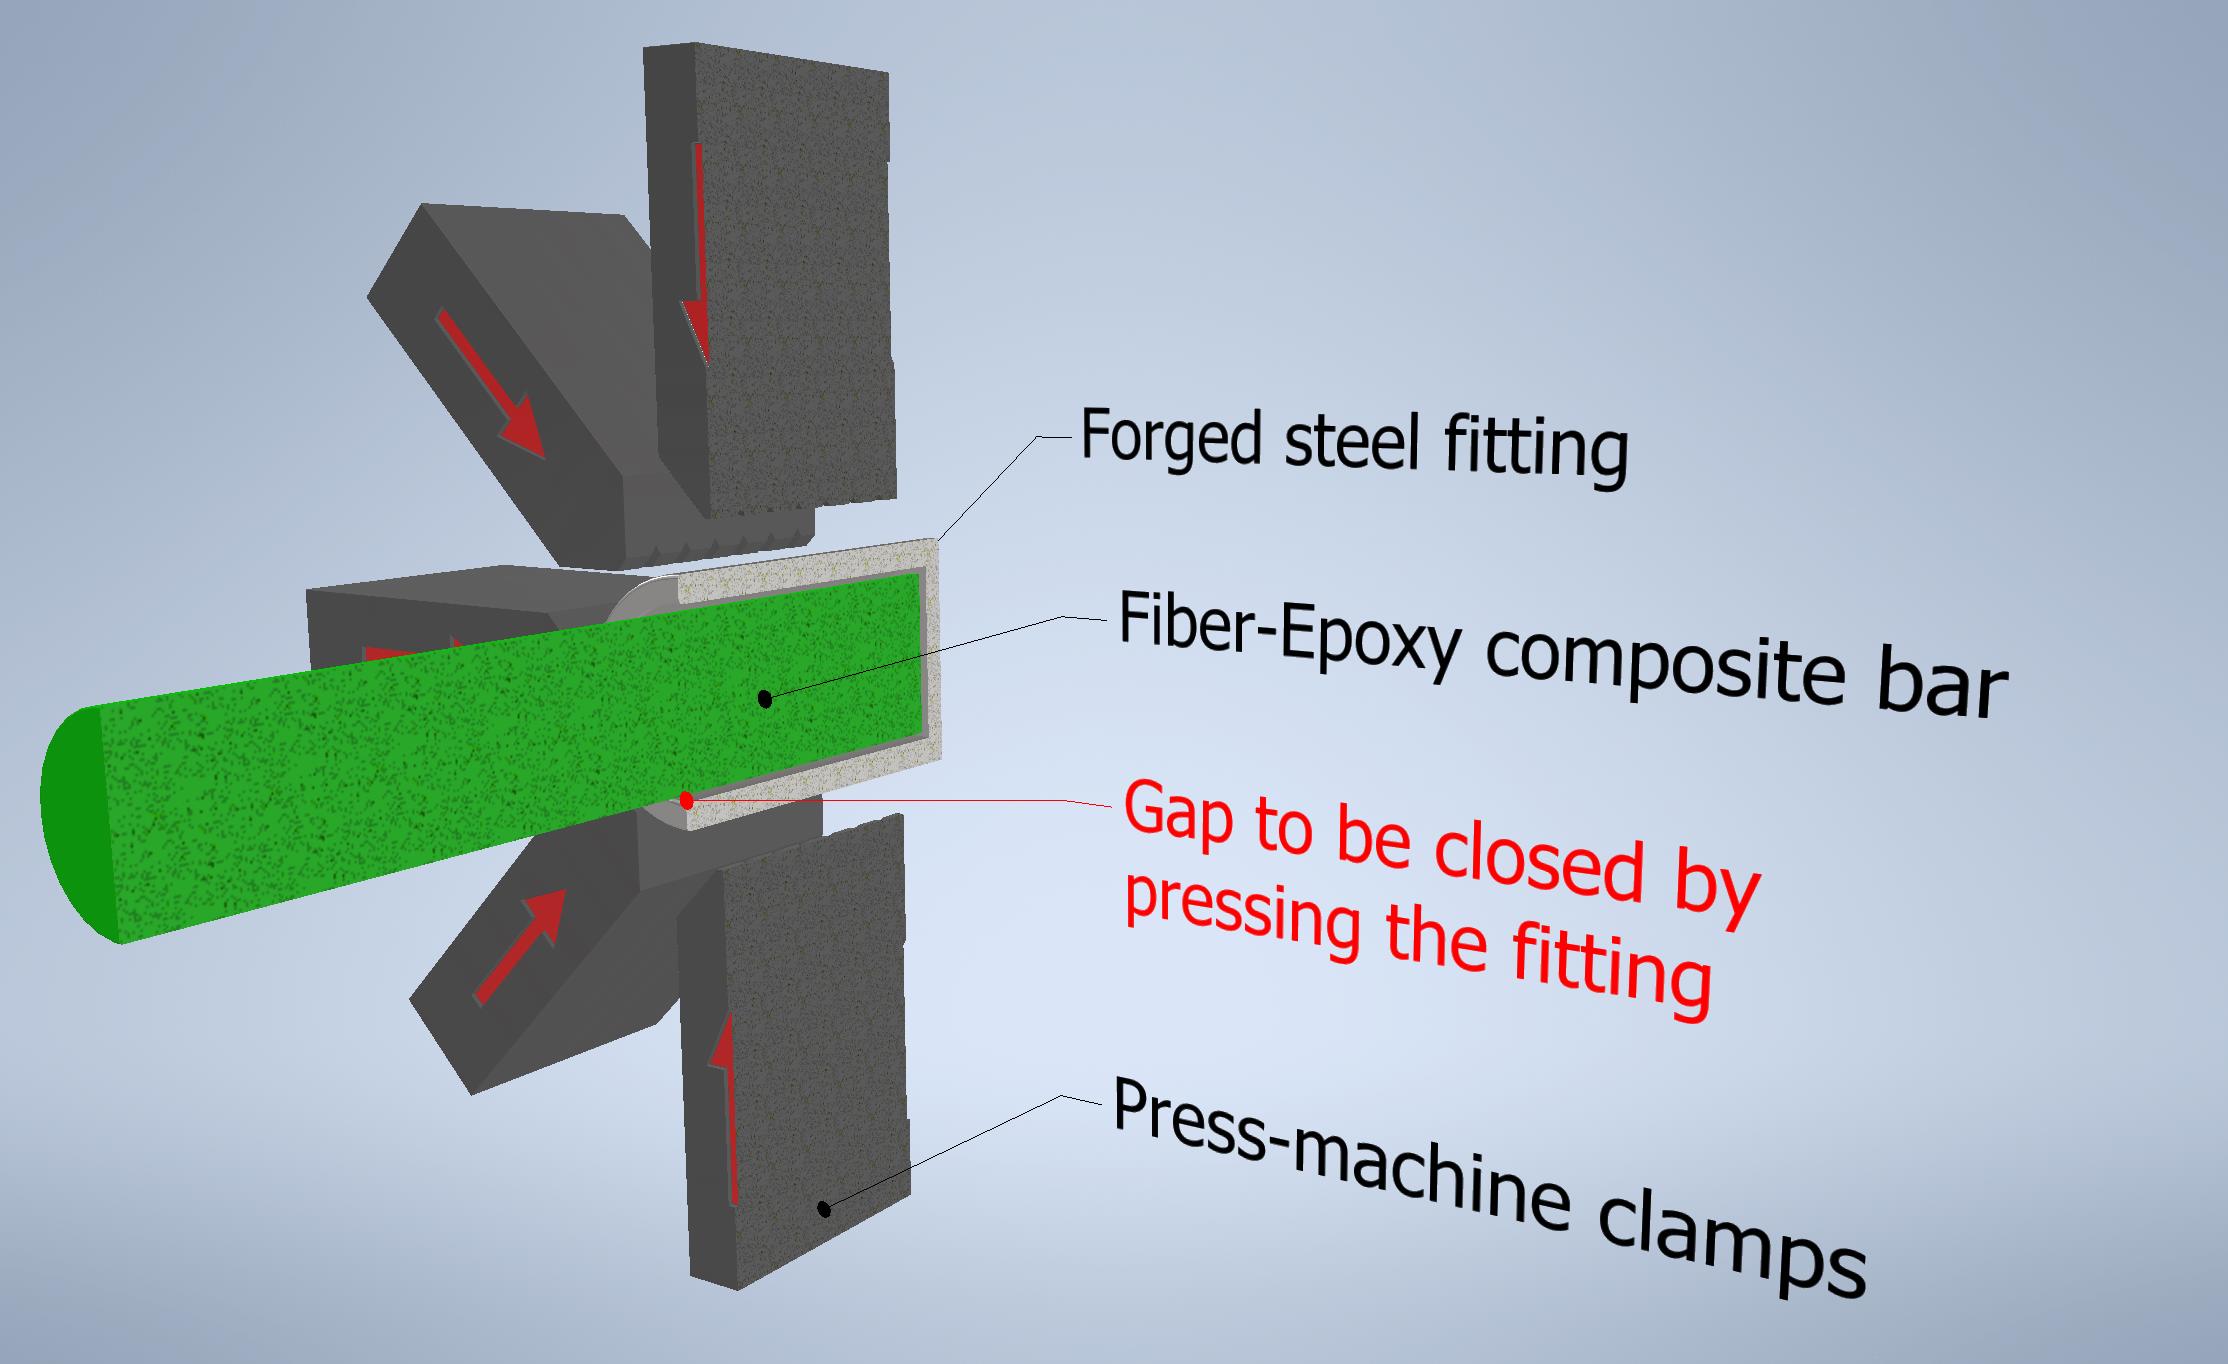
In the manufacturing process, there is an operation to press a forged steel part onto the end of a fiberglass-reinforced epoxy resin rod. The wall of the steel part is thick (8-15mm) and much harder than the rod on which it is pressed. Thus, the range where the pressing can be called adequate is very small. If the pressing force (pressing path) is less than necessary, the two pieces can easily slide apart. (After pressing, there is a mandatory test pull, in which such cases immediately indicate a fault.) And if the metal part is over-pressed, the plastic bar inside will crack. It will also be scrapped. The displacement of the press jaws is monitored by a sensitive (μm resolution) scale-gauge and the pressing is performed according to this value.
The Problem

The starting point of the pressing is the point where the pressing jaw abuts the wall of the metal part. This can be easily detected by a sudden increase of the pressure value of the hydraulic fluid moving the press jaws. However, a very large standard deviation can be measured in the values of both the outer diameter of the plastic rod and the inner diameter of the metal part to be pressed. So, if we always choose the same distance of press paths from the above-mentioned starting point, it turns out to be too few or too many. If e.g., a small bar diameter is randomly paired with a large hole, the compression will be weak, during the test the two parts will slip apart (= scrap). And if a “thick” rod is paired with a narrow hole, the same press will break the plastic rod (= scrap again).
Solution (6-Sigma Project)

How long press path is actually needed?
First, the distance between the walls of the two parts must be eliminated. This is always different depending on the given diameters. Second, after contacting the two surfaces, the same distance must always be pressed (assuming that the other physical properties of the materials are permanent) to produce exactly the same stress in the bar. (For simplicity, the internal stress of the steel part and the elastic deformation <rebound> after pressing are not taken into account)
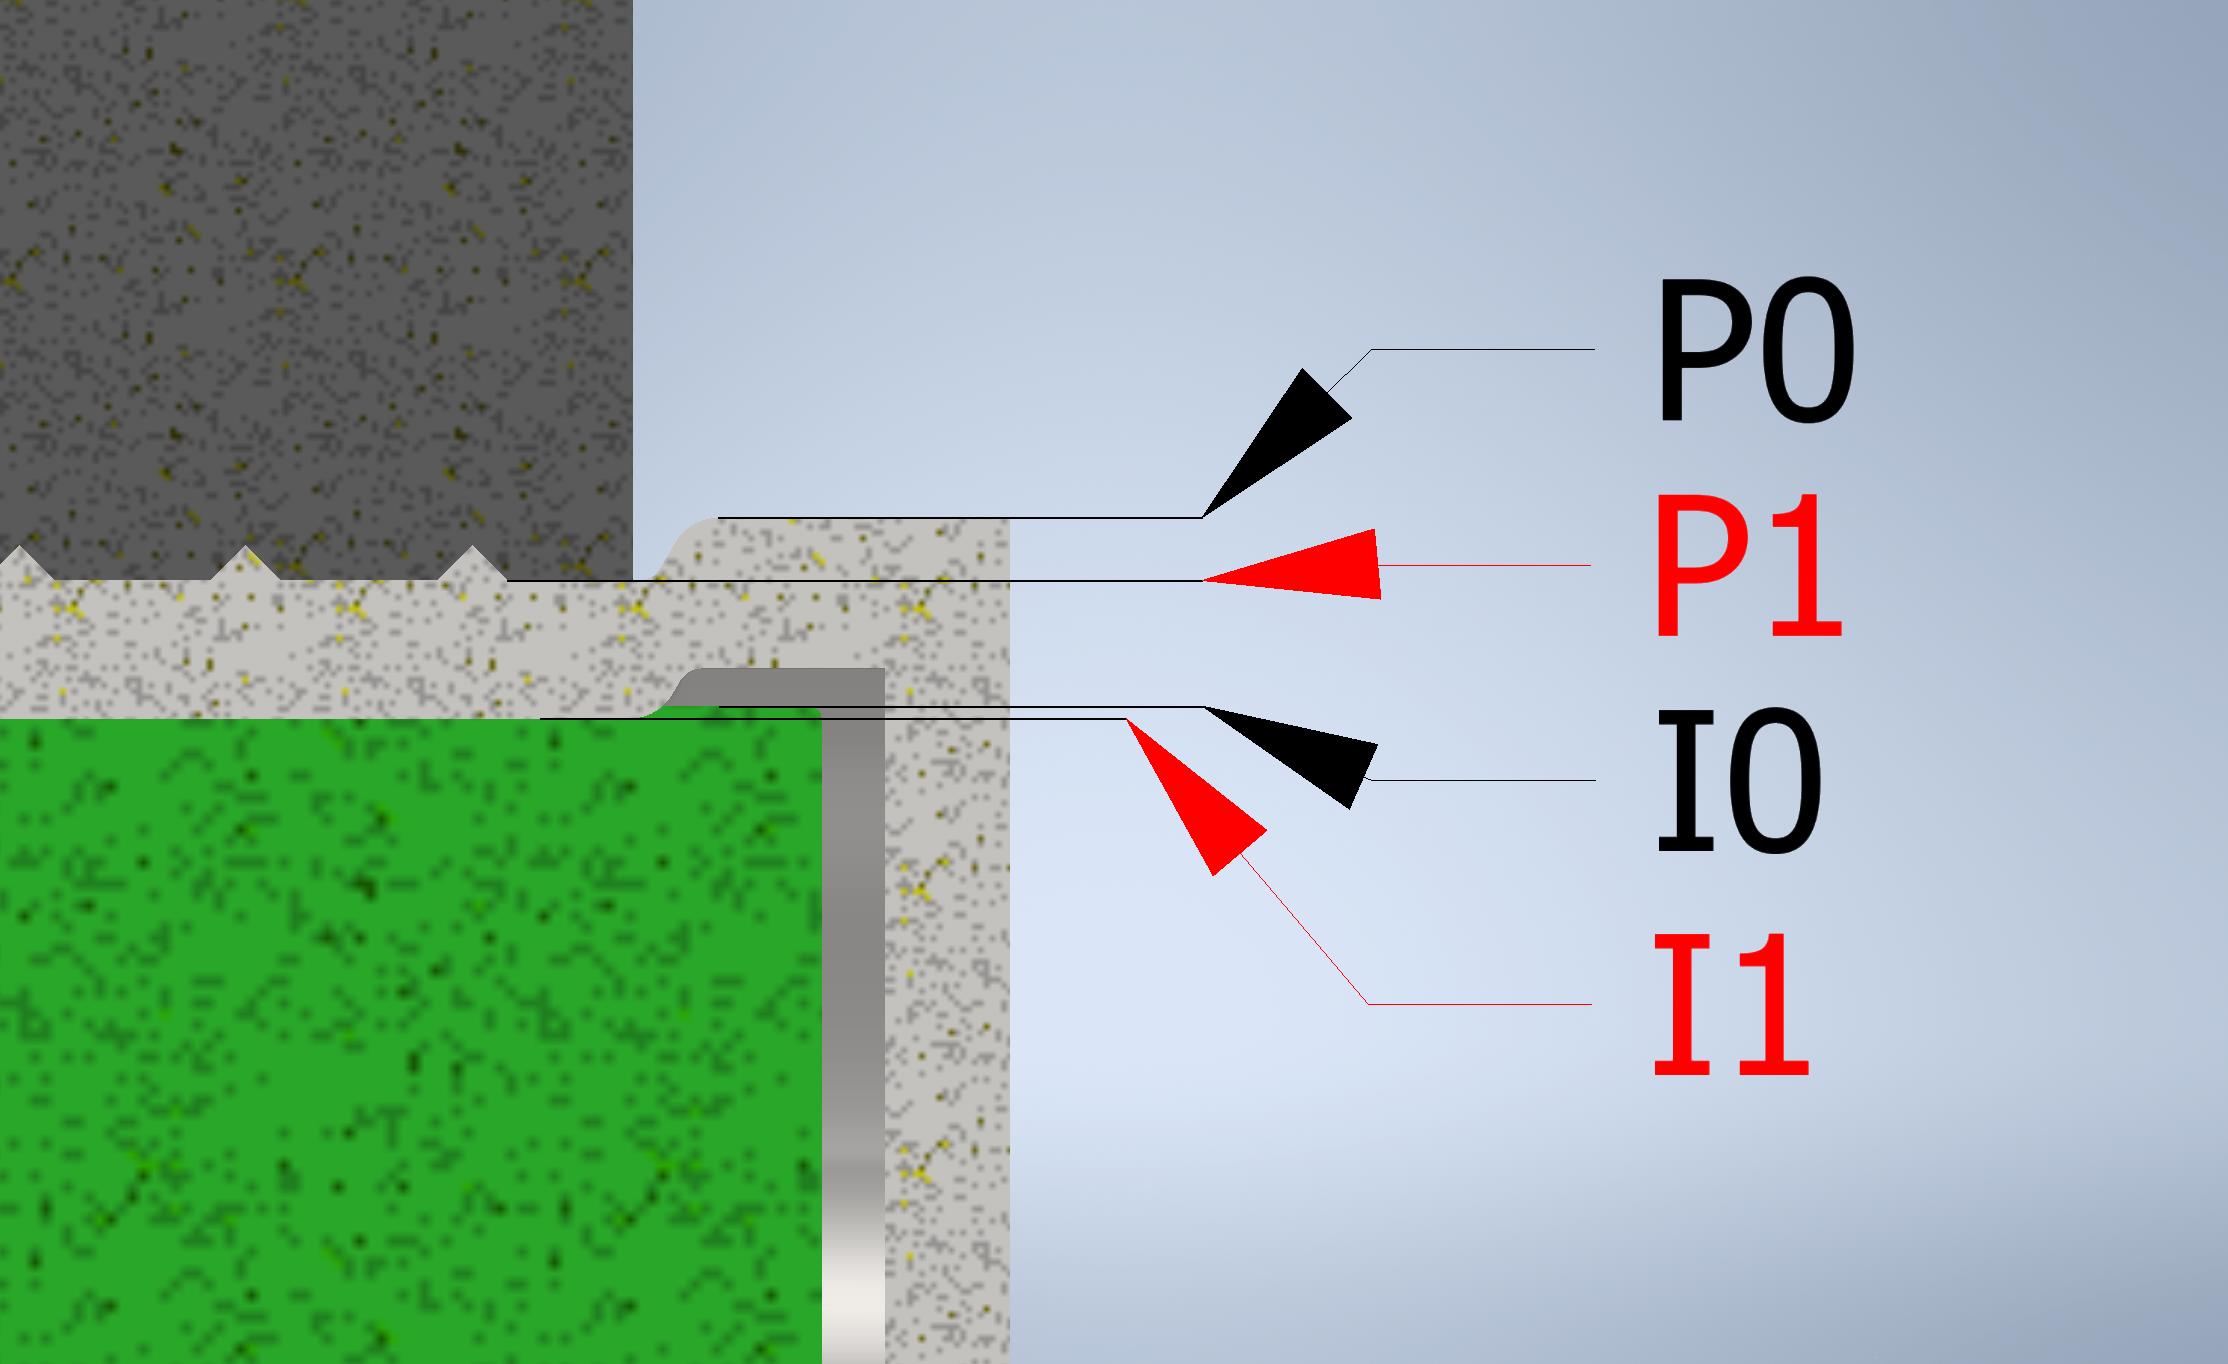
Displacement of the pressing clamps: s = (D – d) + p
Where: s is the full press path; D is the inner diameter of the metal part; d is the outer diameter of the plastic rod; and p is the path of further pressing to provide adequate strength (p = I1-I0). Keep in mind that in reality, the clamps move from P0 to P1. Call this distance s’ (s’ = P1-P0). This value has no relation to the original D – d because both D and d have unpredictable deviations from their nominal values.
If we want to subtract the error due to the standard deviation of the diameters from the equation, (to forget D – d), then the reference point where we start measuring the compression path must be taken after the value of D – d is already zero. This happens when the two faces have come into contact. The problem is that we have to detect this event somehow in order to take the reference value (starting point). From the reference point we have to move the jaws so that the inner wall of the fitting intrudes into the rod exactly by distance of s” (s” = I1-I0) . That is exactly what this project is about. Developing a tool that can do this. After performing and testing all kinds of acoustic, ultrasonic and other methods, an extremely simple solution was found.
As long as the surfaces of the two parts do not meet, the rod can be easily rotated in the steel part. When the surfaces meet, the rod gets stuck. To determine this event as accurately as possible, we have developed a special device that, when mounted on the press, indicates to the control software the position of the reference point. By incorporating the new function into the original software, the press now compresses the parts with the same force, eliminating errors due to diameter scattering. (The process is not that simple in reality. It takes a lot of empirical measurement to bring theory and practice into line. The statistical analysis intended to prove the above theory is not included in this post.)
Similar problems can occur in any manufacturing operation, more complex, multi-factor situations can arise. The most important step is to understand and map the mathematical and physical problems. Only after analyzing them can follow the development of the technical solution.

6s as one of the best statistical analysis methods can be applied to almost every manufacturing situation. If you have a bottleneck in your production line or encountering a QA issue, with a 6s project we can help you solve it
